Showing posts with label Puppet's. Show all posts

Sunday, March 24, 2013

Dressing Marionette Puppets

The long awaited dressing of our marionette puppets
are finally here.
Are you ready?
Start with a paper bag
and cut out a pattern for your puppet 
costumes.
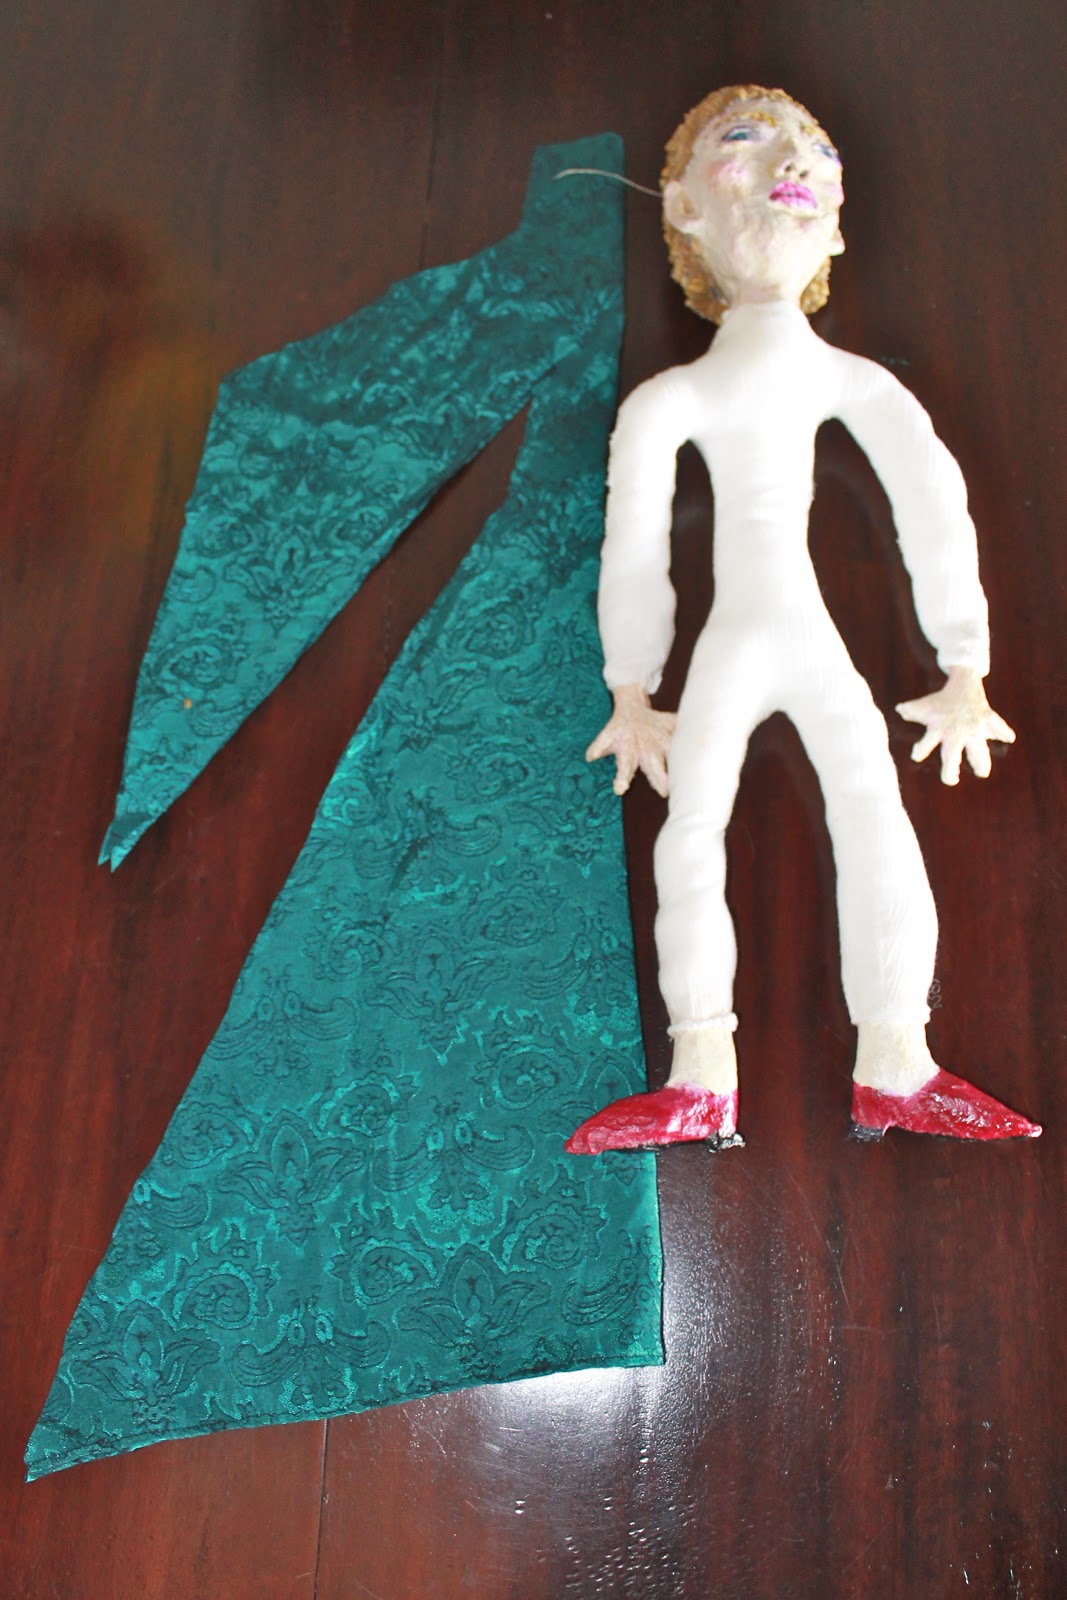
Cut out your fabric and sew your
costumes.
Jane and I used scrap fabric
and old clothes for our puppet costumes. 
We even used an old sweater 
that has worked very well 
for our knights armor.
Guinevere is wearing a faux fur 
cloak and a beautiful rhinestone crown.
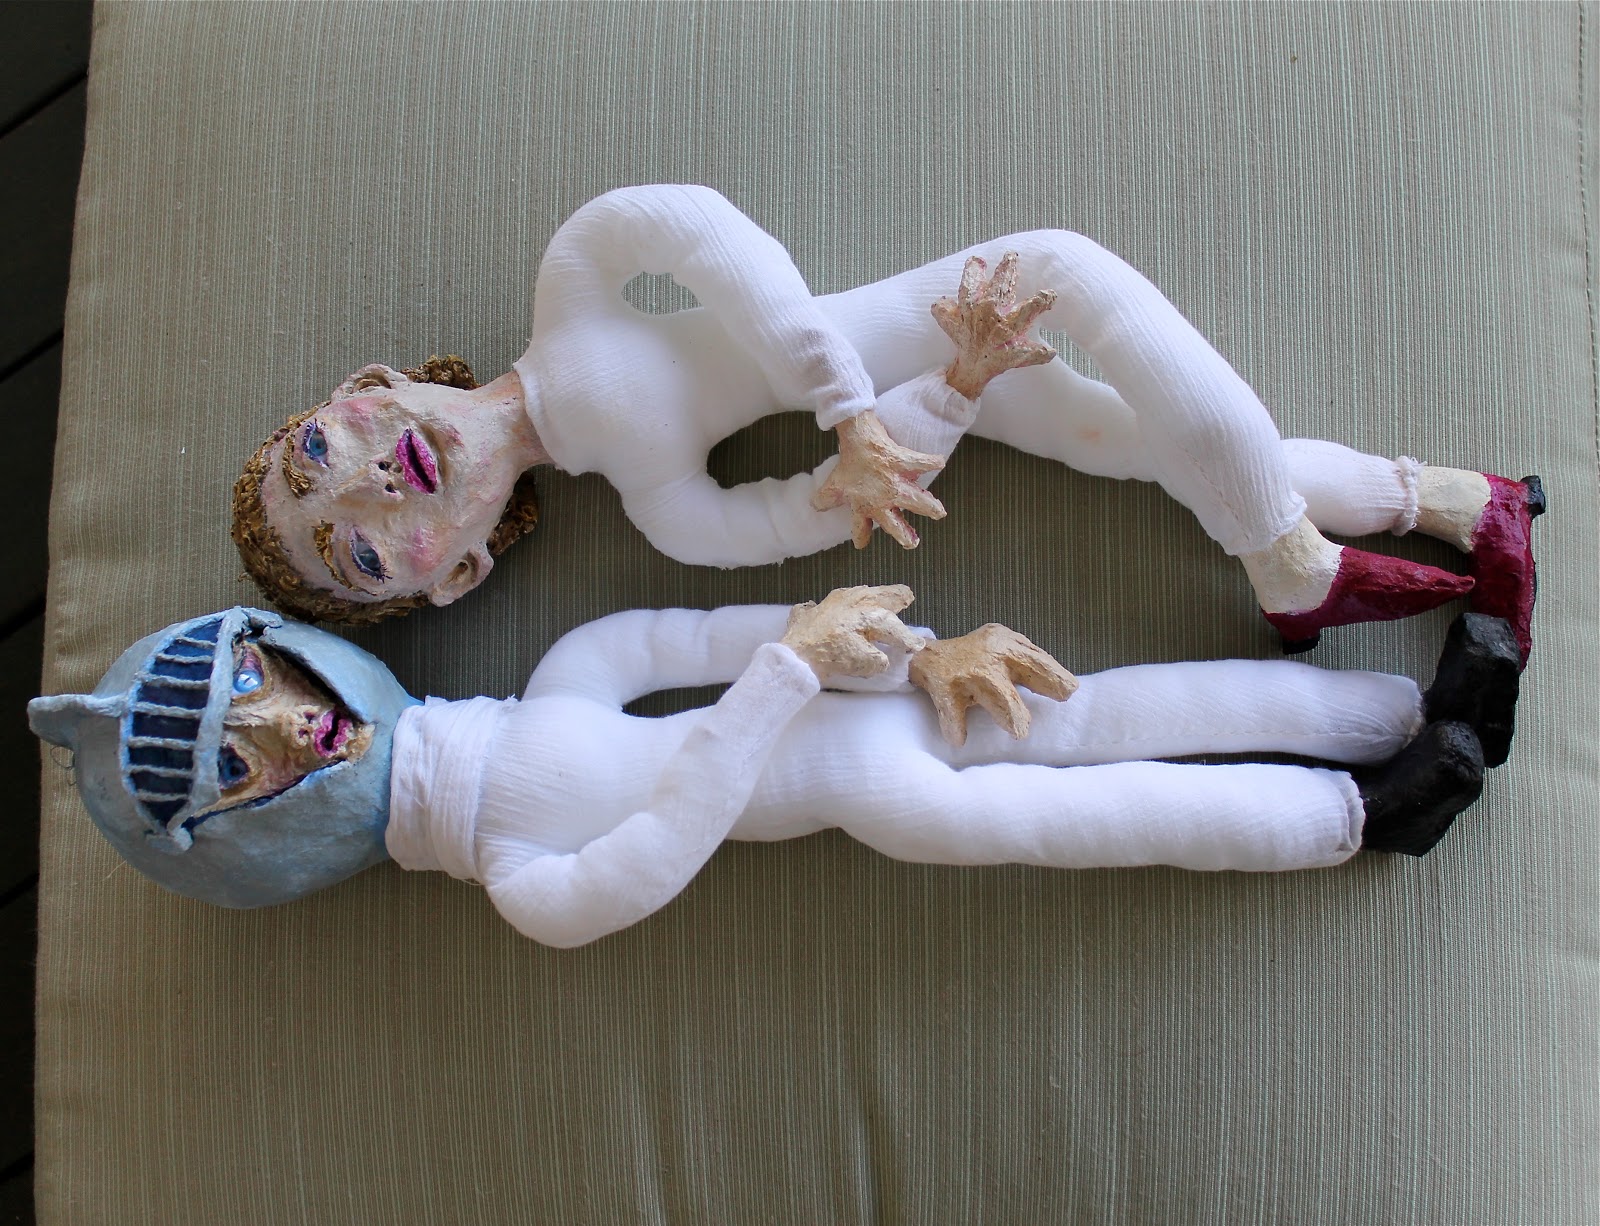
Lancelot is really for any opponent.
He is dressed in his armor and helmet.
Gwen and Lance
Merlin is ready to cast spells
with his mystical charm.
Oh Arthur, Beware! 
Guinevere and Lancelot seem to be
getting very friendly.


Thursday, March 7, 2013

Marionettes - Let's Put These Puppets Together

"Jane, let's put these puppets 
together!"
Our puppet bodies are made and
their heads, feet and hands
are complete.
All we need is a little E6000 glue.
Jane and I are slipping each of our puppets hands 
and feet into their proper places.
The elastic holds the hands and feet in place just fine,
but for added security we are placing a small bit of 
glue just under the inside lip of the elastic.
We secure the puppet's heads in the same way. 
Slide the puppets head into its body
and place a little glue around the 
inside lip of the elastic.
There you go!
Easy, Peezy!
"Hello."
"Will you dress us?"
"Please!"


Monday, March 4, 2013

Marionette Puppets - Part Seven and Eight - Sealing Puppet Pieces and Making Puppet Bodies

Today Jane and I will be 
sealing our puppet pieces.
We will also be making their bodies.
For our sealer we have chosen
 a fast drying polyurethane in a clear satin.
(Follow the direction on your sealer.)
Jane and I sprayed the inside of our puppet heads first.
Then we sprayed there hands and feet.
While these pieces were drying we started making our 
puppet bodies.
Jane and I used old brown paper bags for our
puppet body patterns.
First we traced our puppets heads onto the bag.
 This give us an idea of how large to make
 the puppets bodies. 
We then drew a body on our paper bag
and cut out our pattern.
 For our puppets bodies
 Jane and I used old fabric that we had laying around.
 We folded the fabric in half and
 pinned the pattern to the fabric. 
Then we cut around the pattern leaving a 1/4 inch
of fabric.

Now we have two pieces of fabric in the shape of a body.
Using a running stitch we sewed these two pieces together. 
(Make sure to leave openings for the head, feet and hands.)
Once our stitching was finished it is time to put the 
elastic round the head, feet and hands.
Jane and I used a small round elastic for this.
It was time to turn our material right side out
 and start stuffing our puppet bodies.
We used 100% polyester poly-fill for stuffing.
Our puppet bodies are made.
Now it is time for another coat of sealer on our puppets
heads, feet and hands. 

Sunday, February 24, 2013

Marionette Puppets - Part Six

We have now reached stage six
of our marionette puppet making.
Jane and I have all of our puppet pieces made.
Today is painting day.
We have painted our shoes and hands.
They are ready for the next step.
Merlin has arrived on the scene, 
with his mystical eyes and ethereal look.
King Arthur and Lady Guinevere are such a happy couple.
"Oh, Arthur!"
"Yes, Gwen.", says Arthur
"Have you seen Lancelot?", Guinevere asks.
 Arthur replies,
 "He is waiting for us outside the castle with Merlin."
 The story is already forming as  Camelot's Characters
start to come to life. 
The stringing and wardrobe are next.
It is getting real exciting around here.
See you soon!

Monday, February 18, 2013

Marionette Puppet Making Step Five - Facial Features

This is so exciting, today is the day our puppets 
take on their own personalities.
We will be using a paper pulp called Celluclay.
Jane and I started out by mixing up a batch of
this papier mâché.
With our papier mâché heads placed on top
of bottles Jane and I begin to sculpt our
puppets face's.


We started by placing a very thin coat of this paper clay
on to our heads as a purchase.
Then our puppet's slowly began to come to life.
They really took on personality when we added
the eyes.
 This is Jane and her puppet,
King Arthur.
 King Arthur with hair.
This is my puppet Lady Guinevere.
Is this a Knight or is it an Alien?


King Arthur, Lady Guinevere and Lancelot.
Lancelot needs a little work.
I needed to make Lancelot look like a Knight.
So with Jane's prompting I began looking at photos of Knights.
Jane said,  "Your Knight needs a grill or visor on his helmet."
She was so right.
I also added a ridge on top of his helmet
and I added a place for future plumage.
We now have a true Knight to watch over Camelot.
Merlin will be arriving on the scene
very soon.
Stay tuned.


Sunday, February 17, 2013

Marionette Puppet's - Step Four


Before we begin to mold the features onto our
puppet's we must place a hook into 
the top of our puppet heads.
This will allow us to string our puppet's 
later. They will then become marionettes.
Jane and I gathered our dry puppet heads.
We took wine corks and cut them into about 1/2 inch pieces.
Then we took a drill with a small drill bit
and drilled a hole into the center of each
wine cork piece.
Jane and I took a paper clip and straitened one end of it.
Then we ran it through the the cork.
We bent the bottom half of the paper clip 
so that it would stay put
 and not pull through the cork.
Now we had to drill a small hole
 into the top of our puppet heads,
and a large hole into the bottom of the head.
In order to get the cork into the top of the head 
we used a long wooden skewer, a piece of string
 and a small piece of tape.
We taped the string onto the bottom of the skewer 
and the top of the paper clip.
Using the pointed end of the skewer we ran it through the bottom
 of the puppet head and pushed through the top of the head.
 Once the paper clip was out of the top of the head we took the string 
off of the skewer leaving it attached to the paper clip.
 We then turned the end of the paper clip 
making it into a circle for future stringing.
Now our puppet heads are ready for 
facial details.
Tomorrow our puppets will begin to 
come alive.